今回は文字の調整を行います。
最初は表示タイトルを表示するTextViewのitme_titleから変更しましょう。
文字の調整はstyles.xmlを利用するべきです。layoutのxmlファイルに記述するのは、効率が悪い上に可読性も損なわれるので避けましょう。
styles.xmlはvaluesフォルダ内に作成します。記述内容は以下の通りになります。
<?xml version="1.0" encoding="utf-8"?>
<resources>
    <style name="itme_title_style">
        <item name="android:textSize">20sp</item>
        <item name="android:textColor">#000000</item>
        <item name="android:typeface">monospace</item>
        <item name="android:textStyle">normal|bold</item>
    </style>

    <style name="itme_explain_style">
        <item name="android:textSize">14sp</item>
        <item name="android:textColor">#ff0000</item>
        <item name="android:typeface">monospace</item>
        <item name="android:textStyle">normal</item>
    </style>

</resources>
以下に属性の説明を記述します。
android:textSizeはテキストのサイズを指定します。単位はpxでなく、spを使ってください。 spを使うことで、ユーザーが指定したフォントサイズが自動で拡大縮小されます。
スクリーンの解像度と指定したフォントのサイズを端末側でうまく調整してくれるのです。
もっと詳しく知りたい方はhttp://developer.android.com/guide/topics/resources/more-resources.html#Dimension を熟読してください。
android:textColorはテキストの色です。16進数で指定します。
android:typefaceはテキストの書体を指定します。
日本語の場合はmonospaceを指定し、英語はsansを指定するのが一般的です。好みの問題もありますが、これらが一般的には読みやすいとされています。
腕の良いデザイナーさんが近くにいる場合は、その辺をレクチャーしてもらうといいと思います。私はgimpやinkscapeを使って画像の作成もよく行うのですが、周りのデザイナーさんの影響は凄く大きいです。デザインの勉強は、プログラミングにも絶対プラスになります。って話がずれましたね。
android:textStyleはテキストのスタイルを指定します。
boldは太字です。他にはにitalic(斜体)も指定できます。
続いて、このstyles.xmlで指定した文字情報をhome_list.xmlに反映させましょう。以下のように指定します。
<?xml version="1.0" encoding="utf-8"?>
<RelativeLayout xmlns:android="http://schemas.android.com/apk/res/android"
    android:layout_width="fill_parent"
    android:layout_height="fill_parent"
    android:background="#ffffff"
    >

    <ImageView android:id="@+id/image"
       android:layout_width="100dip"
       android:layout_height="wrap_content"
       android:adjustViewBounds="true"  />

 <TextView
   android:id="@+id/itme_title"
   android:layout_width="wrap_content"
   android:layout_height="wrap_content"
   android:layout_toRightOf="@id/image"
   style="@style/itme_title_style" />

 <TextView
   android:id="@+id/item_explain"
   android:layout_width="190dip"
   android:layout_height="wrap_content"
   android:layout_toRightOf="@id/image"
   android:layout_below="@id/itme_title"
   style="@style/itme_explain_style" />

    <ImageView android:id="@+id/arrow_image"
       android:layout_width="35dip"
       android:layout_height="wrap_content"
       android:layout_alignParentRight="true"
       android:layout_centerVertical="true"
       android:adjustViewBounds="true"
       android:src="@drawable/arrow_button" />

</RelativeLayout>
赤の部分が変更した箇所です。style="@style/ + 属性名"で設定します。
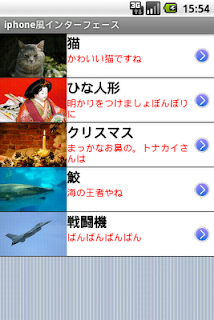
さて、ビルドして、androidエミュレーターを起動しましょう。

Good!!
うまいこと表示されましたね。
次はヘッダーを追加しましょう。アプリケーションのタイトルバーも不要なので削除します。
public class HomeActivity extends ListActivity {

 private File sdcardDir = Environment.getExternalStorageDirectory();

    /** Called when the activity is first created. */

    @Override

    public void onCreate(Bundle savedInstanceState) {
        super.onCreate(savedInstanceState);
        requestWindowFeature(Window.FEATURE_NO_TITLE);
        setContentView(R.layout.home);
    }

    // 以降変更なし
requestWindowFeature(Window.FEATURE_NO_TITLE);が追加されています。
これでアプリケーションのタイトルバーが消えます。
続いてheaderを追加します。画像を用意します。gimpで作成します。

だいぶ色が濃くなってしまいましたね。まあ、ご愛嬌ということでw。
ではheaderをリストの上に配置しましょう。
<?xml version="1.0" encoding="utf-8"?>
<RelativeLayout xmlns:android="http://schemas.android.com/apk/res/android"
    android:layout_width="fill_parent"
    android:layout_height="fill_parent"
    android:background="@drawable/bg_home"
    >


    <TextView
        android:id="@+id/header"
        android:layout_width="fill_parent"
        android:layout_height="40dip"
        android:text="@string/header_home"
        android:background="@drawable/header_home"
        style="@style/header_home_style" />


    <ListView
        android:id="@+id/android:list"
        android:layout_height="fill_parent"
        android:layout_width="fill_parent"
        android:layout_below="@id/header"  />

    <TextView
        android:id="@+id/android:empty"
        android:layout_width="wrap_content"
        android:layout_height="wrap_content"
        android:text="@string/nodata"
        android:layout_below="@id/header" />


</RelativeLayout>
注意して欲しいのは、ImageViewでなくTextViewを利用していることです。
画像に直接文字を記述したheader画像を用意するより、文字のない画像を用意したほうが汎用性があるのでお勧めです。
style="@style/header_home_style"で文字の調整指定を行っているので、styles.xmlに追加が必要です。
<?xml version="1.0" encoding="utf-8"?>
<resources>
    <style name="itme_title_style">
        <item name="android:textSize">20sp</item>
        <item name="android:textColor">#000000</item>
        <item name="android:typeface">monospace</item>
        <item name="android:textStyle">normal|bold</item>
    </style>

    <style name="itme_explain_style">
        <item name="android:textSize">14sp</item>
        <item name="android:textColor">#ff0000</item>
        <item name="android:typeface">monospace</item>
        <item name="android:textStyle">normal</item>
    </style>


    <style name="header_home_style">
        <item name="android:textSize">25sp</item>
        <item name="android:textColor">#ffffff</item>
        <item name="android:typeface">monospace</item>
        <item name="android:textStyle">normal|bold</item>
        <item name="android:gravity">center</item>
    </style>


</resources>
赤の部分が変更した箇所です。
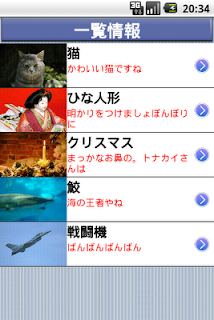
さて、ビルドして、androidエミュレーターを起動しましょう。

Good!!
うまいこと表示されましたね。
ただこうしてみると、header画像の背景に透過処理は不要ですね。今回は面倒なので、このままにしときますw。実際に作る場合は気をつけましょう。
あとは、個人的に分割線が気になるので、分割線を変更します。
<?xml version="1.0" encoding="utf-8"?>
<RelativeLayout xmlns:android="http://schemas.android.com/apk/res/android"
    android:layout_width="fill_parent"
    android:layout_height="fill_parent"
    android:background="@drawable/bg_home"
    >

    <TextView
      android:id="@+id/header"
      android:layout_width="fill_parent"
      android:layout_height="40dip"
      android:text="@string/header_home"
      android:background="@drawable/header_home"
      style="@style/header_home_style" />

    <ListView
        android:id="@+id/android:list"
        android:layout_height="fill_parent"
        android:layout_width="fill_parent"
        android:layout_below="@id/header"
        android:divider="#696969"
        android:dividerHeight="2sp" />

    <TextView
      android:id="@+id/android:empty"
      android:layout_width="wrap_content"
      android:layout_height="wrap_content"
      android:text="@string/nodata"
      android:layout_below="@id/header" />

</RelativeLayout>
赤の部分が変更した箇所です。
android:dividerで分割線の色を指定、android:dividerHeightで高さを指定しています。
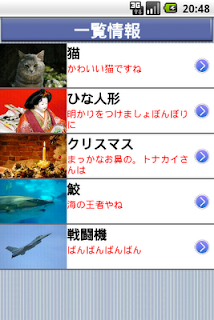
さて、ビルドして、androidエミュレーターを起動しましょう。

Great!!
色が濃い灰色に変更され、高さも変わりました。
とはいうものの、あまり違いがわからなくなってきたかもしれませんね。
これ以上はキリがないので、これでtutorialは終了です。
というわけで、長いチュートリアルをここまでつきあってくださったみなさん、大変お疲れさまでした。
今回私がこのチュートリアルを作成したのは、普段海外のチュートリアルに色々助けられていて、なにか自分にもできることがないかなと考えたのが発端です。
日本だと、tipsのようなちょっとした情報はたくさんあっても、チュートリアルのような作成に手間がかかる説明は少ないのが現状です。これは日本のエンジニアが置かれている無駄に長い労働環境が影響しているのかもしれません。
ただ、せっかく世界標準のandroidなのだから、こういった文化も世界標準にしていきたいです。
次は番外編でgimpを使ったandroid用画像の作り方なんかできたらなと思います。ちょっとした画像が作成できると、プログラマーは重宝すると思います。 gimpはフリーソフトだし、是非覚えておくといいと思います。
では、このへんで。みなさん素敵なandroid Lifeを。
See you next time.
Bye!
0 件のコメント:
コメントを投稿