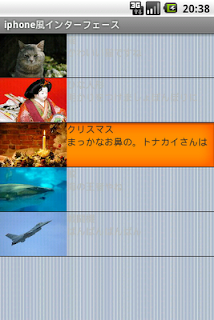
まずは背景を変更することからはじめましょう。
黒だとiphoneっぽくないですもんね。
ということで背景画像を作成します。ソフトはフリーソフトのgimpを使います。
android開発者なら、photoshopでなく、やはりフリーのgimpでしょう(お金かからないですからね)。
作成した画像は以下のファイルです。

gimpを使った画像ファイルの作成の仕方もそのうちtutorialにする予定ですが、今回は上記のファイルをそのままDLして利用してください。もしくは、他の画像を使って代用するなどしてください。
さて、これをhome.xmlの背景に設定しましょう。ファイルはdrawableフォルダに配置します。
<RelativeLayout xmlns:android="http://schemas.android.com/apk/res/android"
    android:layout_width="fill_parent"
    android:layout_height="fill_parent"
    android:background="@drawable/bg_home"
    >

    <ListView
        android:id="@+id/android:list"
        android:layout_height="fill_parent"
        android:layout_width="fill_parent" />

    <TextView
      android:id="@+id/android:empty"
      android:layout_width="wrap_content"
      android:layout_height="wrap_content"
      android:text="@string/nodata" />

</RelativeLayout>
android:background="@drawable/bg_home"で背景の設定を行っています。
レイアウトの変更なので、こまめに確認していきましょう。ビルドして、androidエミュレーターを起動させてみます。

Oh Yeah!!
しかし、リストの中の背景まで変わってしましましたね。
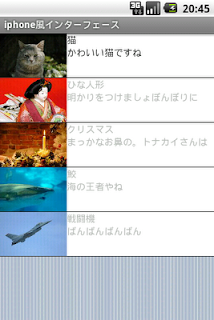
これだと見づらいので、リストの中の背景は白に変更しましょう。
リストの中の背景はhome_list.xmlに設定します。
<?xml version="1.0" encoding="utf-8"?>
<RelativeLayout xmlns:android="http://schemas.android.com/apk/res/android"
    android:layout_width="fill_parent"
    android:layout_height="fill_parent"
    android:background="#ffffff"
    >

    <ImageView android:id="@+id/image"
       android:layout_width="100dip"
       android:layout_height="wrap_content"
       android:adjustViewBounds="true"  />

    <TextView
      android:id="@+id/itme_title"
      android:layout_width="wrap_content"
      android:layout_height="wrap_content"
      android:layout_toRightOf="@id/image"  />

    <TextView
      android:id="@+id/item_explain"
      android:layout_width="wrap_content"
      android:layout_height="wrap_content"
      android:layout_toRightOf="@id/image"
      android:layout_below="@id/itme_title" />

</RelativeLayout>
android:background="#ffffff"を追加しました。
ビルドして、androidエミュレーターを起動します。

Oh Yeah!!
白になりましたね。
だいぶiphoneっぽくなりましたが、まだまだです。
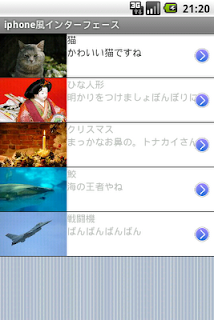
iphoneはリスト列に矢印画像がありますよね。というわけで矢印画像も追加してみましょう。
背景と同じようにgimpで作成します。以下のような画像を作成してみました。

これをリスト画面で表示されるようにhome_list.xmlに追加します。
<?xml version="1.0" encoding="utf-8"?>
<RelativeLayout xmlns:android="http://schemas.android.com/apk/res/android"
    android:layout_width="fill_parent"
    android:layout_height="fill_parent"
    android:background="#ffffff"
    >

    <ImageView android:id="@+id/image"
       android:layout_width="100dip"
       android:layout_height="wrap_content"
       android:adjustViewBounds="true"  />

    <TextView
      android:id="@+id/itme_title"
      android:layout_width="wrap_content"
      android:layout_height="wrap_content"
      android:layout_toRightOf="@id/image"  />

    <TextView
      android:id="@+id/item_explain"
      android:layout_width="wrap_content"
      android:layout_height="wrap_content"
      android:layout_toRightOf="@id/image"
      android:layout_below="@id/itme_title" />


    <ImageView android:id="@+id/arrow_image"
       android:layout_width="35dip"
       android:layout_height="wrap_content"
       android:layout_alignParentRight="true"
       android:layout_centerVertical="true"
       android:adjustViewBounds="true"
       android:src="@drawable/arrow_button" />


</RelativeLayout>
android:id="@+id/arrow_image"を追加しました。画像なのでImageViewです。
ビルドして、androidエミュレーターを起動します。

Oh Yeah Great!!
うまいこと表示されましたね。
さて、ここでは色々な属性を使ったので、重要な属性の説明をしておきましょう。
注意して欲しいのが
android:layout_centerVertical="true"
です。
これを
android:scaleType="center"
としてしまわないようにしましょう。
こうしてしまうと、画像は中央に配置されません。
android:scaleType="center"はあくまで、ImageViewオブジェクト内での配置の位置を決定します。layoutの位置を決定するわけではありません。
一方でandroid:layout_centerVertical="true"はlayoutの中での相対的な位置を示しています。ここでやりたいことはlayoutの中央に配置することなので android:layout_centerVerticalを設定するのです。
慣れないうちは、はまってしまうことが良くあるので注意しましょう。
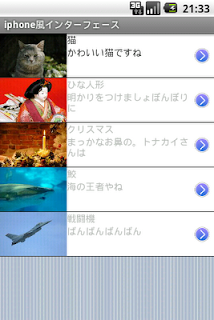
さて、中央の説明文の文字が画像とかぶっているのが気になりますね。これも修正しておきましょう。
<?xml version="1.0" encoding="utf-8"?>
<RelativeLayout xmlns:android="http://schemas.android.com/apk/res/android"
    android:layout_width="fill_parent"
    android:layout_height="fill_parent"
    android:background="#ffffff"
    >

    <ImageView android:id="@+id/image"
       android:layout_width="100dip"
       android:layout_height="wrap_content"
       android:adjustViewBounds="true"  />

    <TextView
      android:id="@+id/itme_title"
      android:layout_width="wrap_content"
      android:layout_height="wrap_content"
      android:layout_toRightOf="@id/image"  />

    <TextView
      android:id="@+id/item_explain"
      android:layout_width="190dip"
      android:layout_height="wrap_content"
      android:layout_toRightOf="@id/image"
      android:layout_below="@id/itme_title" />

    <ImageView android:id="@+id/arrow_image"
       android:layout_width="35dip"
       android:layout_height="wrap_content"
       android:layout_alignParentRight="true"
       android:layout_centerVertical="true"
       android:adjustViewBounds="true"
       android:src="@drawable/arrow_button" />

</RelativeLayout>
android:layout_width="190dip"に変更しました。
ビルドして、androidエミュレーターを起動します。

ポイントはandroid:layout_width="190dip"ですね。この辺の値の感覚は慣れが必要です。
単位はspでもうまく動くのですが、layoutにはdipを使用するのが正式です。
このあたりのことは、次回の文字の調整で説明します。
というわけでまだまだ続きます。
0 件のコメント:
コメントを投稿